Thursday, January 31, 2013

Picture Canvases Made Easy

My brother and his new bride recently were married this past fall.  So, when Christmas time came around, I new that I wanted to give my new sister a gift that looked impressive and came from the heart.  I'd seen different types of diy picture canvas ideas floating around Pinterest so I decided to give it a try.  I had fun doing it and by the time I was done, even I was impressed by what I had accomplished.   It was a progression of images from the proposal, engagement photos, and the wedding....


***Just a thought, with Valentine's around the corner, this would be such a meaningful gift for someone special whether it be a significant other, parent, grandparent, etc...

My supplies:
Three 8 inch square canvases
Three 8x11 inch photos
Black spray paint
Elmer's spray adhesive
Mod Podge matte finish
Sponge brush
Old dish/container
Ribbon
Tacks


Spray paint the canvases.  Don't worry about the main canvas surface getting perfectly painted because a photo will go on top.  Focus on getting the edges and sides sprayed well.  Next, cut the photos down to 8" squares.  


Cover the canvas surface with the spray adhesive and the set photo on top.  Make sure the edges have extra glue sprayed on so that the edges of the photo will adhere well.  Let the photo set....as long as you like :)  I let mine set overnight since I didn't have a full day to complete the project in one sitting.  


I poured some Mod Podge into an old dish and grabbed my sponge brush.  I know the "sponge brush" has a more official sounding name but I just kind of like the sound of it and I'm sure you know what I'm referring to based on the pictures.  I dipped my brush in and then starting coating the canvas.  It went on very cloudy but dried clear.  


It's also important to be aware of how you are painting the Mod Podge on because once it dries you will be able to see the brush strokes on the canvas.  I used diagonal brush strokes on mine but I've seen waves and random strokes used on other projects that turned out great too.  Hopefully in the picture below you can see what I mean when you "see the brush strokes."  The Mod Podge starts to set decently quick so get a complete first layer on as fast and neatly as possible....similar to painting your nails...when the polish starts to dry and you brush over it, you can see the brush marks and it doesn't look quite as smooth.  


Let the canvas set until the Mod Podge layer has dried clear.  I applied a second coat to ensure the photo edges wouldn't peel off the canvas down the road. 

Almost done! I cut some black ribbon and tacked it onto the back of the canvas frame.  I think they would've been just as cute without the ribbon but it gives another option for hanging.  


I could tell it turned out really well when my mom asked me where I ordered them from.  I LOVED how they looked when all was said and done and will definitely be making a set of photos for myself.  I especially loved how these photos capture some of the most precious moments in their life.  I feel so strongly that it's important to remember where you've come from and what journey life has taken you on...these are a reminder for two amazing people in my life about how amazing their love story has taken shape.  


Saturday, January 12, 2013

Preferred pharmacy

Do you have a preferred pharmacy?  Do you have one particular place that your doctor sends your prescriptions to so your trusty pharmacists can review them for problems or interactions? If not, please consider doing so...for your sake and my sanity. This is a story that happened to me this past week. Please follow the logic (rather, lack of logic) that the patient had. Just having one pharmacy could have solved this whole mess, saved an hour of my time, and could have saved him a lot of frustration...

It was around 6pm. A very nice, older man walked into the pharmacy. He asked, "Did the doctor send in four prescriptions for my wife this morning." After searching the computer, his wife had never been to our pharmacy and we had no prescriptions. Unhappy that the doctor didn't send the prescriptions in, he left disheartened.

A few minutes later I pick up the phone to hear him on the other line. "It turns out that my doctor sent the prescriptions to Kostco but the pharmacist won't call you to transfer the prescriptions. He said that you need to call him to get the prescriptions...and they close at 7pm."
"Ok, do you know Kostco's phone number so I can call them?"
"No I don't"
"But you were just talking to them, correct?"
"Yes, but I don't have their phone number. You need to call them before they close at 7pm."

After searching the directory for Kostco's phone number, I called and transferred over the two prescriptions the doctor had sent them. I billed the insurance plan on file. To my surprise I received a rejected insurance claim saying "refill too soon." Hmmm....if Kostco doesn't have this prescription filled anymore, then who does?

I called the insurance plan to find out that Write-Aid had filled the same medicine last night in a small West Virgina town 45 minutes away. I called Write-Aid and asked their pharmacist, "Do you have anything filled for Marsha Apple?"
"Why yes we do. I have four prescriptions ready. They asked us to transfer them from Jiant pharmacy in Virginia yesterday."
I said, "Wait, you have four prescriptions ready that you already had to transfer in? I just called Kostco and they only had two new prescriptions sent in today. That's funny because Mr. Apple told me he was originally expecting four too."
"All I know is that they called us yesterday to transfer them. And your pharmacy is in the same town in Virginia right."
"Yep. I just don't understand people sometimes...."
"Yeah, that's retail for you."

I called Mr. Apple back and asked him if he knew the same prescriptions were already filled at a Write-Aid in West Virginia. He angrily stated, "Of course I did. I told them that I didn't want them filled anymore though. Can you just transfer those over to your pharmacy now?"

After calling back Write-Aid to transfer the medications, I was speechless from this ring of phone calls. Mr. Apple could have just told me that Write-Aid had the prescriptions all along...all four of them.....Four pharmacies had to handle these prescriptions - Kostco, Write-Aid, Jiant, and my pharmacy. With so many places I can only imagine the confusion the doctor must have been in after talking to this patient trying to figure out where these prescriptions should go.

Please, please, please, go to one pharmacy. I don't care which pharmacy you go to but choose only one (or one chain).   At every office visit, make sure that same pharmacy is listed as the "pharmacy of preference." And always always always bring your most current prescription insurance card with you...it is not always the same as your medical card....


Continually amazed at what people do,
    Your Pharmacist


Thursday, January 10, 2013

Stripping and Staining, Uncovering a Find

JANUARY'S LESSON

I don't normally make "New Year's Resolutions."  I agree with the thinking of a friend that if I wanted to make a change, it shouldn't take a holiday to make me think I can do it all of a sudden.  This is not said to discourage anyone, because if a fresh year gives you the encouragement you need to begin anew, then that's wonderful, truly!  Everyone is different when it comes to attaining the confidence they need when laying down old habits and starting new ones.  I did however somewhat decide on a "resolution" for the year.  Rather, it's something I've been wanting to do and a whole new calendar year will help me stay on track a little more....I want to learn something new every month.  I'm not talking about learning a new fact because that's too easy.  Rather, I want to figure out how to do something new.  So for January, I gave myself a head start and am using a project that I started in December and finally finished this month- stripping a mirror and breathing new life into it.

So we begin...

I often take a daily look at the free items on Craigslist in my local area.  One day I came across this huge mirror listed as "free, by curb."  What's even better was that it was listed in my town so I didn't have far to travel.  Well, I picked this thing up and it was hheeaaaavvvvyyyy (later found out it was 70 lbs).  Anywho, it had this old 70's shellaq (or what I think was shellaq) on it.  The old yellowish color clearly dated it, so if I wanted to use the mirror, I had to change it.  Thus, my challenge began.

I learned how to strip (the DIY way).  I went to Home Depot and asked for help.  I thought they were the "If you can do it, we can help" store but I was wrong, but they were still helpful though.  They're the "more saving, more doing" which was true in my case.  Since I had no idea what finish or coating was actually on the mirror, the worker recommended the spray-on stripper since it would take off anything. I bought my protective gloves and a scraper to get the old varnish off.  Note- I really don't know if it was shellaq, a clear coat or varnish...tried to look it up but still confused....Anyways, I asked if medical gloves would work to save a few dollars, but he just smiled, chuckled, and politely said, "You don't want to do that."  I did, but then I didn't at his advice :)


Okay, so at home I found a well ventilated area to shield me from the cold - my garage.  I laid newpaper down on the concrete followed by the mirror on top.  I dawned my gloves and a hoodie to stretch over my mouth/nose from the fumes and began spraying.  There was no need to worry about the stripper damaging the mirror so I didn't have to be nearly as careful.


I let the stripper set for 15 minutes, tested an area, but found it needed to be on a little longer.  Then I set to work with my scraper.  The old varnish scraped right off.  I took care not to gouge the wood though in the process.  It was therapeutic in a way, especially with my music blaring....no sick customers coughing on me, no insurance companies to deal with, no doctors to bug about refills.....it was nice.  So I scraped all the gunk off and gave it a good wipe down with the towel.  I had to repeat the process again just to make sure I removed all the varnish that was set on tight.  Next, I lightly washed the wood with water and a clean towel.


Now, was the fun part...re-staining!!!!  Re-transforming!!!  I have to say, I loved the look of the natural wood color that I almost wanted just a clear finish to retain it, but, it wouldn't match my dining table, so we had to scratch that.  With my chosen stain, I brushed it on in the direction of the grain and let it set 10-15 minutes.  The stain itself was a lot darker than how the wood looked after I rubbed it off with a towel.  I put two more coats of stain on and left it longer each time until I was satisfied with the color.  Note - figure out what wood you're working with before you pick an appropriate stain to enhance it.  I didn't do this but wish I had a little more so I could dress the wood in a color keeping with its original characteristics.


Once the staining was dry (I gave it a day), I washed it down with a wet washcloth and let it dry some more.  I noticed after the fact that some stain had dried on the mirror.   No worries though because I sprayed a little stripper on a paper towel, wiped it right off, and then cleaned it again with water.

At last it was ready for the final step - mounting it on the wall.  I used OOK wall anchors and fastened wire to the back of the mirror that could hold its weight.  Finally, the task was done...my dining room looked a little more dressed up.  


I definitely made mistakes along the way and the final piece had some imperfections, but I was proud of it.  I was proud because I found an item that someone thought was trash and gave it a new look...plus I learned something new in the process.   

Wednesday, December 19, 2012

Ornamental Pizzazz

Since we bought our home, I've always been super excited about the holidays.  Instead of just having a Christmas tree now there's a fireplace and stairs to adorn with lights and greens.  Every December I slowly fill our home with more and more splashes of ornamental color and sparkle.  You might have seen some of the ideas below from various magazines, sites, or friends (which is what inspired me), so hopefully it will show you how easy it is to dress up your home a tid-bit more.  Plus, most of what I did only took mere seconds or minutes to do!

I have a very simple fireplace (without decor) because I really can't decide how to decorate it.  But, with greenery, stockings, and ornaments added, it's becomes a little nicer.  If you have greens on the mantle, add a few ornaments to dress it up!  Also, grab a couple vases that aren't being used and fill them with extra sparkle to add some color...I used my trifle bowl stacked on top of cookie tins for some height...plus it draws attention away from our white speaker.


This is my China cabinet.  It's not a traditional cabinet, but hey, I love it and it works.  It's actually an armoire that we saved from our local ReStore shop.  What a bargain it was, plus it helps out Habitat for Humanity!  So, on top I added another vase of ornaments and a little candle holder as well as some festive wording.  I love color, color, color, if you can't tell :)


This is our breakfast table with more ornaments.  This time I hung ornaments from the curtain rod and set the table with chargers and a full bowl.


I didn't realize how many ornaments I had until I filled so many vases and bowls up!  This next one sits on my coffee table.  You might think I overdid it with the filled bowls, but I absolutely love it and it feels so much more holiday-ish.


Lastly, I thought I'd throw on a glimpse of our tree....


With all these pictures, hopefully this served as a little inspiration to you :)  It's never too late to add a little more Christmas pizzazz to your home.

Thursday, December 13, 2012

Our Family Christmas Cookies


For years my mom would use a different cookie recipe (I’ll share that down the road).  However, once my grandma found this version using sour cream we never went back.  The cookies just turn out softer than others.  They freeze really well too.  Occasionally I’ll put little sprinkles on a select few.  The sprinkled ones are my Love’s favorites because he says they have freckles like he does J This may sound silly but I used to dream about marrying a guy with freckles…funny how some of the wildest things come true!  Back to the cookies though, I don’t sprinkle them all because the colors can sometimes bleed onto the icing if I defrost them and have to refreeze again.  Nonetheless, the cookies taste just as yummy!

Word to the wise, this recipe requires time.  I reserve this process when I have a day off and can blast the Christmas music as loud as I want or watch Parenthood on Netflix all day.  If you have little kids or family around this would be a great way to spend time together!    It makes between 9-10 dozen cookies.  After making this a few times, I definitely had an appreciation for grandma doing this every year. 


Holiday Cut Out Cookies

2 C butter                  
3 C white sugar        
5 eggs                       
¼ C water                 
1 C sour cream
1 t baking soda
1 t baking powder
1 t vanilla
7 C flour

Add sugar and butter, then add eggs, water, and sour cream.
Add dry ingredients, chill dough. Roll and cut out. (You may
Need to add more flour so dough isn’t too sticky.)  Bake at
350 degrees for 8 minutes. DON’T OVERBAKE. Bake until
Puffed up.


Icing 

½ stick oleo/butter
½ t salt
2 t vanilla
¼ C milk
3 C powdered sugar

Beat all together.
*can substitute 2 egg whites for milk
*about 1.5-2 batches for 1 batch of cookies, depending on how much frosting you prefer


From Grandma’s kitchen, to mine, to yours – Enjoy!


Thursday, December 6, 2012

Enfuselle and ProSante under the Christmas Tree

To all the guys out there - let me help you this Christmas!  Visit anewleaf.myshaklee.com and check out Shaklee's beauty care line.  It's the perfect Christmas gift for your wife, girlfriend, mom, mom-in-law, aunties, grandmas, etc!!!  Give your special loved ones a trip to their own little spa-at-home with some of these boutique-like products that I've tried and loved.  I know some of my family members will be receiving these goodies!  Even more importantly, the products are paraben free without the worry of "potentially harmful" or questionable preservatives.

Give her a mineral masque and an exfoliator
You know those cliche scenes in moves where the women soak in warm bubble baths with music playing?  Yeah, that's me, and I own it.  Nothing makes me feel more pampered and relaxed than applying a luxurious masque and soaking in a bath with a glass of wine.  Instead of music I'd probably watch a cute movie on Netflix....but that's my time to unwind, de-stress, and take care of myself.  How about the moms out there?  When's the last time you did something for you?  Having seen how hard my mom worked raising my brothers and me, I wish growing up she would have taken more time to pamper herself..the Lord knows she deserved it with all we put her through.  My picks - Enfuselle Refining Polisher, Enfuselle Infusing Mineral Masque.  PURCHASE HERE


Or a cleanser and moisturizer.

This is probably one of the most important parts of my day, for my skin at least.  Our face is the most visible part that our friends and family see.  Why not take care of it?  Clean the day's make-up off and hydrate the laugh-lines to refresh and revitalize your skin.  I'm not a beleiver in Botox and cosmetic surgeries, but I do believe that taking care of myself is my responsibility.  Maybe it's all the years of dealing with acne-prone skin, but having a healthy, glowing complextion makes me feel a little prettier inside :)  My picks - Enfuselle Purifying Cleansing Gel, Enfuselle Hydrating Moisturizer.  PURCHASE HERE


Let her feel beautiful from head to toe.
 How often do we talk about those good and bad hair days?  Shaklee has your salon-at-home needs in one place.  From shampoos to scalp treatments, there's something for everyone.  Whenever I go to the hair dresser, I always call my hair "virgin hair" because I've never colored it.  Too hard to part with the money in my wallet I suppose...but nonetheless, whether you enjoy coloring your lovely locks or not, these products are safe for any type of hair.  My picks - ProSante Revitalizing Shampoo, ProSante Replenishing Conditioner, ProSante Long-Lasting Finishing Spray.  PURCHASE HERE


Need more ideas?  Just send me a note below and I'll be happy to help you finish you Christmas shopping list.  The gifts aren't the most important thing of the holiday, but we can sure use it as a time to show our family and friends how much they are loved. 

Friday, November 30, 2012

Grandma's Dressing


There's a few things my grandma is known for in our family: cinnamon rolls, Christmas sugar cookies, cheesecake and dressing, to name a few.  She keeps most of her recipes in a pull-down, wooden box attached to the wall in her kitchen.  I'd say it's a small box, but it's actually pretty large.  There's so many recipes inside that box.  When I was at her home the last holiday get-together, I took pictures of every recipe inside that container hoping that one day I would bake my way through it or find her golden recipes that one day I could make for my grandkids.

Today my cooking adventure took me through the dangers of the broilers and treacherous waters of boiling veggies.  Did this succeed in the end?  To be determined....

The recipe from the box (word for word)

Dressing
4 C chicken, cooked and cut
4 C chicken broth
12 eggs
4.5 C milk
1 stick butter, browned
3 t salt
1 t fresh ground pepper
4 C cubed potatoes
3 C carrots
2.5 C celery
1.5 C onion, chopped
36-40 slices bread, toasted (about 2 loaves)

Toss together then pour into well-buttered pan. Bake at 300 degrees until puffed up.


So here's the carrots, onions, and celery all chopped up together.  Place in large pot and almost over with water. Heat till boiling, then simmer for about 10 minutes or half-way cooked.  Once half-way cooked, add potatoes below.

When cutting up the potatoes, remember to place them in a bowl of water to prevent them from browning before use.  Once added to the pot of veggies, let simmer for an additional 10-20 minutes, or until cooked.  The small chunks don't take too long to soften.   

Buy extra bread!  I think I burned half a loaf because the broiler kept playing jokes on me.  "Not done yet."  Then it laughed at me saying, "Just kidding sucker, it's waaayyyy too done now."

This was the egg/liquid mixture MINUS the browned butter.  Alongside of it is the cooked chicken.  Mom told me that any chicken is fine to use, but bone-in meat will be juicier, and it was.  I added a good little bit of water to some bone-in thighs and then microwaved till cooked.  Slow-cooking or baking is fine too though.  I kept this extra chicken broth from the thighs to add to the final dressing mixture when figuring out the right consistency before baking (see video to be posted below, sorry it came out sideways). 

Once the ingredients are mixed together and placed into baking dishes, you're almost ready to go.  At this point, melt the butter in a small saucepan.  Don't leave the butter alone.  On low-medium heat, stir the butter until it turns brown, hence "brown butter."  Pour over dressing and throw in the oven, not literally though.  That'd be a waste of hard work :)


According to the recipe, bake till puffed up.  I supposed only years of cooking would know exactly how long that would be when trying to time this correctly.  After a few calls to grandma, it takes around an hour or so.  I baked at 300 degrees for 40 minutes and then turned it up to 400 degrees for 20 minutes since I was a little rushed.  It turned out great though!  If your edges start to turn brown, cover with foil and place back in oven until fully cooked.


What's great about making dressing?  It can be made ahead of time and frozen!  Just thaw and bake.  Also, if it's already baked, freeze the leftovers if there's plenty.  It'll make a great dinner later on this winter - veggies, meat, potatoes, and bread all in one dish.

From grandma's kitchen, to mine, to yours - ENJOY!!

Thursday, November 15, 2012

Month of Thanks

It took me a little while, but I finally figured out why friends on Facebook would write "Day 1: I'm grateful for ...." or "Day 7: Thankful for..."  It's a month of thanksgiving.  I think it's great that so many people took a moment out of their day, each day this month, to think of something they are thankful for.  This is my list of 22 reasons to be thankful (Since Thanksgiving leads up to the 22nd).

I'm thankful for:

1. A family that loves me regardless of what happens in life.
2. Warm weather during the fall
3. Ability to pay my bills and a steady job
4. An adorable nephew that makes me laugh with all his silly faces.  He's such a goof.
5. My parents giving me music lessons as a child.  I can now learn the guitar as an adult.
6. A doggy, Akaila, that reminds me how important it is to give unconditional love.  If you have a "lap dog" you totally understand what I'm saying.
7. A new pharmacy to work at (been there about 2 months now)
8. My health
9. An independent spirit.  It's gotten me to where I am now.
10. A carmera to capture all the precious moments throughout the past year
11. The patients I meet that say "Thank you" and mean it.
12. Friends to share laughter with and our Thanksgiving meals together.
13. Starting my own family traditions to pass along
14. My husband coming home safe from riding his motorcycle
15. Caring neighbors that help each other
16. Living in a small town surround by beautiful rolling hills that provide gorgeous sunrises and sunsets.
17. Mentors to advise me through life.  Thanks Robin and Geri!
18. PUMPKIN CUPCAKES
19. Hard life lessons that make you stronger and wiser
20. Chances to learn cooking secrets from my grandma (about to attempt her stuffing this weekend!)
21. A Savior to redeem me
22. An amazing husband, words cannot describe

There's so many more things I could list, but those are the first to come to mind.  Ok, so I love pumpkin cupcakes apparently.  I'll share my recipe below.  The cupcake part is from Martha Stewart and the icing is from the blog Patent and the Pantry.  You can make regular size cupcakes or break out the mini muffin tin (if you run out of liners like I did) and make bite-size morsels of deliciousness.


Cupcakes

2 cups flour
1 tsp baking soda
1 tsp baking powder
1 tsp coarse salt (I generally use regular salt)
1 tsp cinnamon
1 tsp ginger
1/4 tsp nutmeg
1/4 tsp allspice
1 cup packed brown sugar
1 cup granuated sugar
1 cup unsalted butter, melted, cooled
4 large eggs, lightly beaten
1 can (14-15 oz.) pumpkin puree

Wisk flour, baking soda, baking powder, salt and spices.  In separate bowl, wisk sugar, butter, and eggs.  Add to dry ingredients.  Add in pumpkin puree.  Fill cupcake liners half-full.  Bake at 350 degrees for 20-25 minutes.

Icing
1 pkg cream cheese (room temp)
1/2 cup butter (melted, then cooled)
3 cups powdered sugar
1 tsp vanilla

Mix and spread on cooled cupcakes. 

Enjoy!!!


http://www.marthastewart.com/317069/pumpkin-cupcakes
http://www.patentandthepantry.com/


Tuesday, October 30, 2012

Learn to Read Medication Boxes, Part 2


So let's begin on this journey again. Last time we discussed something important, changing our mindset when it comes to medicine purchases. We need to think in terms of buying an ingredient instead of buying a name. Today we are going to start looking at boxes.  Most times, over-the-counter (OTC) boxes have a few sides that are dedicated to cramming as much information into the space as possible.  Or, it seems that way at least.

If you have a brand name box, on the front of the package you'll see its brand name. In this instance, we see the name Advil®. Notice that below the name Advil® is the active ingredient, ibuprofen. That active ingredient is what is responsible for helping reduce fever and inflammation. If you rotate the box, you will also find the name of the active ingredient at the beginning of the Drug Facts section. As you will see further below, the ingredient in not Advil®, rather, the ingredient again is ibuprofen.

This is not an endorsement of a particular store brand.

Now I know there's a lot of tiny print in the Drug Facts section. It can be overwhelming to look at. However, there's a lot of important information found here. Don't worry, we'll go through it slowly together. The different sections found in the Drug Facts section are:
 
-Active Ingredient
-Uses
-Warnings
-Directions
-Other Information
-Inactive Ingredients

So let's take a closer look at the Active Ingredient portion.  It starts out saying "Active Ingredient (in each caplet)." Just that little amount of information already tells me something. It gives me a dose amount/serving-size - 1 caplet. Let's go a bit further. Next is says "Ibuprofen 200mg (NSAID)" Therefore, when you ingest 1 caplet, you have just taken 200mg of ibuprofen.


Notice how after the (NSAID)* there is a *. This * means that the manufacturer has something extra to say, like a definition, about that sentence or word. We need to find another * on the box to see what it means. As it happens, the next line says *nonsteroidal anti-inflammatory drug. We found the second *! Therefore, that * after (NSAID)* is saying that NSAID stands for *NonSteroidalAnti-Inflammatory Drug.

Let's look at a another example of this on the front of the box. After "100 Coated Caplets" there is another *. That star means we have more information somewhere on the box about what a caplet is. Very conveniently, it happens to have the matching single star right below it saying Capsule-Shaped Tablets. It's a definition saying what a "Caplet" is. Let's say the box said 100 Coated Caplets***. See how there's three stars? Well, then you'd look somewhere on the box for *** to see what additional information the company is trying to relay.

There's one other piece of information that the Active Ingredient section will give - the purpose of the ingredient. In the example above, the purpose next to ibuprofen is pain reliever/fever reducer. In other words, it is telling you what the ingredient does. 

Whew! That was a lot of information in such a tiny space!  Great job keeping up though. These steps will make you an informed consumer, something that I think is very important. Know what you are putting into your body and what it will do for you. Next time, we'll examine more areas of the box.

Questions?  Leave a comment below if anything is unclear so far. 

Monday, October 15, 2012

Got Darts? Protect Your Wall.

We'll revisit medicine boxes later next week...

It seems that whenever the hubby leaves town on business, I get so many more projects done than normal (love you babe!).  You see, after his long hour and a half commute home, most times we just want to have dinner, "chillax," and catch each other up on our day.  So with all the time in the world on my day off, I set to work.

I am dangerous with darts in hand.  Dangerously bad.  

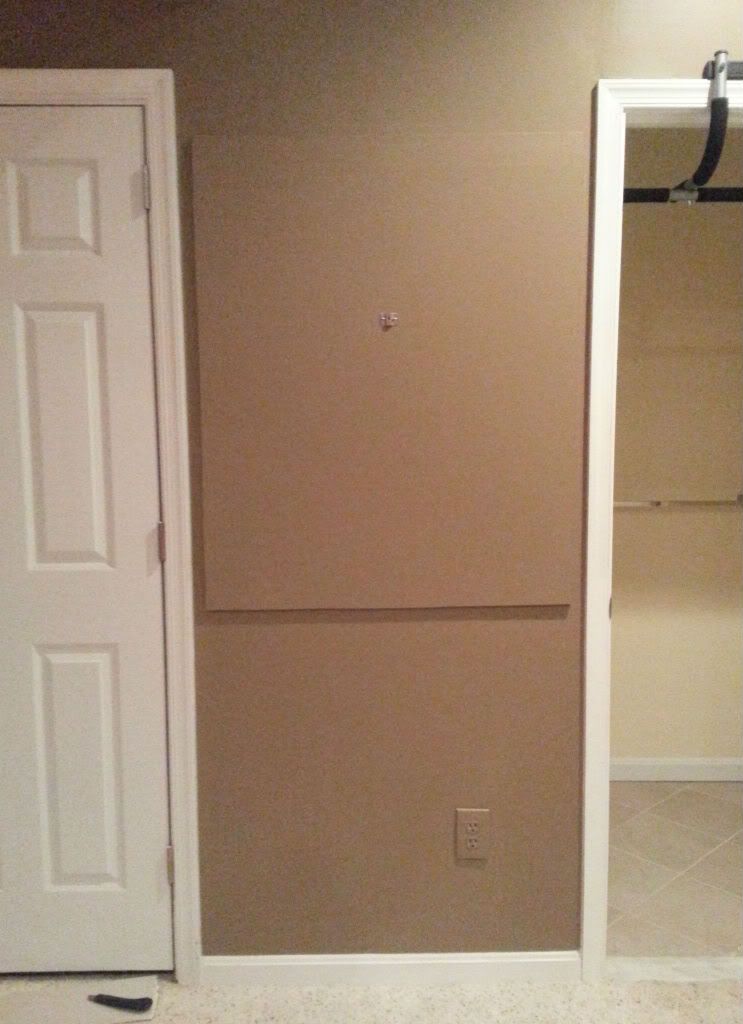
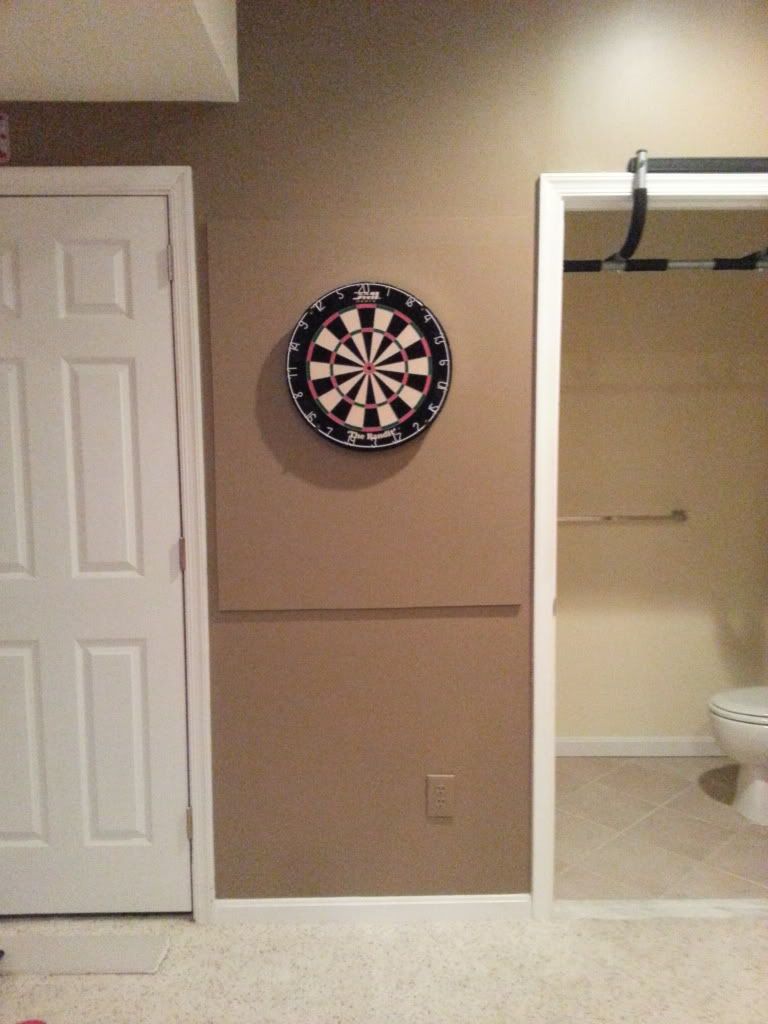
My walls fear me because they have no idea where my inconsistent aim will go.  Drywall or wood-trim?  All are fair game in this struggle to hit the mark.  For this reason, I've been meaning to nail up an extra layer of wood or drywall so I won't keep damaging the existing surface.  I have to say, it turned out pretty well too.  My goal was to go to Home Depot and not spend too much for this job.  We're trying to stick to a tight budget for the next few months, so every dollar counts.  After all was said and done, I didn't spend a dime doing this fix!  I had all the materials I needed lurking out in the garage.

When we bought our home, the former owners left behind a large sheet of drywall.  For over a year it has been sitting in a garage corner.  Little did I know that it was waiting there to be drug out and put to use.  My first task was to learn how to cut drywall.  It was really easy too.  All I needed was a box cutter, tape measure, and long yard stick (broom did well in my case).  Then, for the rest of the job I used nails, spackle, fine grain sander, and paint.
1.Mark needed measurement on one side of drywall.  Score drywall with boxcutter using a yard stick (broom in my case) as a guide.
2.Place object underneath drywall.
3.Gently bend along scored line.
4.Cut other side of paper surface.  Tah dah! You just cut drywall!
5.Nail drywall to surface.  Make sure you locate the wall studs so your nails grab onto more to carry the weight of a heavier dart board.  Spackle nail holes and sides of drywall that were cut.  Allow to dry.  Lightly sand.
6. Paint.
7.Hang dart board and have fun!
Before I hung this dart board, we had a cheap board from x-mart on the wall.  The darts were very light and flew everywhere.  After using my fabulous Discover Rewards to purchase a nicer board, I noticed that heavier, metal darts are the way to go.  They remain true to your aim so much better.  If I'd have switched to the new darts earlier, I probably would have saved my walls a few holes.  However, now my walls are prepared for any throw that may come their way.

Thursday, October 11, 2012

Learn to Read Medication Boxes, Part 1

I kept debating about what my next post should be about.  What I finally decided on surrounds a topic that I run into on a daily basis....how to read a medication box.  I want to begin to teach you something important.  When you walk into the pharmacy and ask for Tylenol®, what you are buying is a name brand.  What I want you to start thinking about, rather, is buying an ingredient.  

There are only a select number of prescription medications that require consistency when sticking to a brand or generic product - thyroid supplementation, seizure, and some heart medications to name a few.  Buying a generic medication is not like buying off-brand Oreo's, where you don't know what quality you are going to get.  

Why should I trust generic medications?  Well, straight from the FDA website, "To gain FDA approval, a generic drug must:

·         Contain the same active ingredients as the innovator drug (inactive ingredients may vary)
·         Be identical in strength, dosage form, and route of administration
·         Have the same use indications
·         Be bioequivalent
·         Meet the same batch requirements for identity, strength, purity, and quality
·         Be manufactured under the same strict standards of FDA's good manufacturing practice regulations required for innovator products.*"


Bioequivalent means that a generic drug is identical to a brand name drug “in dosage form, safety, strength, route of administration, quality, performance characteristics and intended use.*”

For example, ibuprofen is an active ingredient used for inflammation, pain, and fever.  It has multiple brand names like Advil® and Motrin®.  In my medicine cabinet, I have plain old ibuprofen, no fancy name brands.  I know that when I buy any ibuprofen over-the-counter, it's going to contain the same amount of active ingredient and work the same way as the ibuprofen in the Advil and Motrin.  Why? Because ibuprofen is ibuprofen is ibuprofen...it's the same ingredient no matter how you package it.  Some companies may give an ingredient a cool name and put it in a box with pretty colors, but if the ingredient is the same as a store-brand version, why pay more for something that works just as well?
This is not an endorsement of a particular store brand.  It simply happens to be the  bottle of ibuprofen I currently have in my medicine cabinet.

Why then does my doctor recommend a brand name over-the-counter medication at my office visit?  Well, name brands are easy to remember.  Companies have done a lot of marketing research beforehand on what names stick in people's minds.  It's a lot easier for a doctor to recommend a name like Allegra® (uh-lay-gruh) than have to train patients how to ask for its generic fexofenadine (fex-oh-fen-uh-deen) in the pharmacy.  Allegra® is a whole lot easier to spell on a piece of paper too :)  If you have a name brand medicine in your cabinet, take out the box and look at it.  Somewhere next to or below the title will be smaller print saying what the active ingredient is, or it should say that at least.  So, below the word Allegra, you'll find the word fexofenadine, the active ingredient.  Once you locate what the active ingredient is, you can compare store-brand boxes around it to find a comparable generic version.

I find it easier for patients to remember what I'm saying if I don't overwhelm them with too much information.  So, I'm going to keep these lessons short so you can absorb the information as it comes.  The one main point to take away from today's lesson is:

Generic medications will work just as well as brand name medications.  The FDA requires it.


*Generic Drugs: Questions and Answers. FDA website. 11 October 2012.  http://www.fda.gov/drugs/resourcesforyou/consumers/questionsanswers/ucm100100.htm


Sunday, September 23, 2012

Basic H2: Cheaper Than Vinegar Water

One of my primary instincts is to ask, "How much is it going to cost me?"  With my detail-oriented tendencies, balancing the budget for our home comes naturally.  In an effort to manage our income wisely, I'm always looking for ways to save a dime or dollar.  I used to think I was being super thrifty and all- natural by using a spray bottle of vinegar mixed with water.  But lo and behold, I’ve found an even better deal than Grandma’s vinegar cleaner  - Shaklee's Basic H2®.


No longer do I have to worry about clipping coupons for window or all-purpose cleaners.  My supplies are so cost effective that it'd be silly to think otherwise.  In addition to being easy on my wallet, I can rest assured that Basic H2 is totally natural and perfect for homes with children and pets.  Like most cleaning solutions that give off strong fumes that can affect the respiratory system, Basic H2 is fume free and pharmacist approved from yours truly :)

So you want the proof?  I’m happy to give it.  Let’s compare the cost savings of a few cleaning brands. 

Comparison of All-Purpose Cleaners

That’s right, the Basic H2® cleaning concentrate makes 384 bottles of all-purpose cleaner!  If I wanted to purchase the same amount of vinegar to make the same amount of all-purpose cleaner, I’d have to spend almost $40.  What’s even crazier is that if I wanted to buy enough 409 All Purpose Cleaner, I’d have to spend near $708!

According to the product bulletin, “many all-purpose cleaners may contain toxins that can be absorbed through the skin or inhaled. Synthetic solvents may cause hormone disruptions. Organic solvents such as butyl cellosolve are neurotoxins and nasal irritants. Another toxin, morpholine, can cause liver or kidney damage. Glass cleaners contain ammonia,a poison that can irritate skin, eyes, and the respiratory system.”  Basic H2 contains none of these.

As showcased on the Oprah Winfrey Show, Shaklee’s Get Clean product line offers powerfully clean alternatives without harmful toxins and fumes.  It is a natural and nontoxic dirt fighting cleaner.  


It was even a part of Oprah’s “favorite things.”


So, in addition to the cost of the cleaning products you buy, have you ever put thought into what chemicals you are bringing into your household?  Especially if you have young children, please consider the fumes that commercial cleaners create within the home.  Please, consider making your household a cleaner and safer place to live.  

You can order here.


Product Brief. 17 September 2012. http://member.myshaklee.com.
White Vinegar and 409 Prices, accessed 17 September 2012. shop.mywebgrocer.com/shop. 
Using Vinegar as an All Purpose Cleaner. www.cleaningwithvinegar.com

Wednesday, September 12, 2012

Take Just A Moment

Earlier this summer, I made a goal for myself.  That goal was to "become bolder."  What I failed to do though, was decide what that meant or would look like.  Some of my girlfriends asked me at the end of the summer if I had reached my goal.  Because of my lack of planning, it was hard for me to answer.  I love to plan and organize, but for some reason I chose to change something about myself without allowing for further direction.  I made a statement.  I thought of a change I wanted to make.  I did not truly set a goal though.  I did not define the goal.

By nature I'm an introvert.  Being a "people person" is not my forte.  Actively getting to know other individuals has been a lifelong lesson with skills that I am constantly trying to sharpen.  I am curious about many things but cautious to give details about myself.  Maybe that's why I want to be "bolder"....to allow others to see what I truly care about.  

So why did I fail to plan ?  Good question.  I plan for trips and I see the result of the trip...fabulous restaurants, interesting activities, and amazing memories.  Our most recent trip was to go to NYC.  If you've never been, it's at least a once-in-your lifetime must-do trip!  I need to change my mindset though.  Working in a retail pharmacy, there's so many "things" you have to do, calls to make, prescriptions to follow-up on, that it becomes very easy to never focus on one task for too long.  This repetitious action of jumping from one topic to another creates the five blog entries I've started but never finished.

In a way, this blog is a constant exercise.  It forces me to sit and think and write.  Researching answers to health questions allows me to revisit old topics.  A New Leaf on Life is a way for me to realize what I love and care about most so that I can put myself out there and become bolder.  My mom's life story circles around "finding your passion and doing everything you can to realize your goals".  By typing each post, I am discovering what I care about and what intrigues me.  

This blog is my goal.  Through it I am becoming bolder, no longer as afraid to show others who I am.  I can learn.  I can teach.  I can do.  

Take a moment for yourself to just think.  When is the last time you made a goal for yourself?  Was it that New Year's resolution nine months ago?  You can make changes any day of the year!  If you do make a goal though, envision what that means, and plan for the change.  Remember, every day is a chance to turn a new leaf  :)